May 25, 2026Comments are off for this post.

Docker Sandboxes, running AI-Agents with MicroVM technology — Review for UX Designers in the Discovery Phase

As AI coding tools become more common in UX workflows, security and isolation concerns are becoming increasingly relevant during early experimentation. While experimenting with Docker’s new Sandboxes feature released in March 2026, I wanted to evaluate whether they address concerns I previously had around AI-assisted development. I discovered Docker Sandboxes while pausing at the instructions for installing Claude Code found in Anthropic’s free Claude Code 101 course. My security-first instinct was to find a way to containerize the install so it doesn’t touch the host OS.

Security considerations often receive less attention during early experimentation with AI workflows. It seems UX designers were eager to adopt these tools without established guidance from leadership on how to utilize the benefits of AI without compromising company infrastructure and security. Many of these concerns were also confirmed by the course material found in The Linux Foundation’s free Secure AI/ML-Driven Software Development course. I encourage all UX designers to take this free course, as it offers a developer’s perspective on the dangers of vibe-coding that will only help bring more security-minded thinking that UX design needs. My main concerns have been:

  • Execution of malicious code. This concern has been at the top of my list. Even with company policies and IT infrastructure in place, allowing a coding agent to install malicious dependencies on the host OS results in the host being compromised
  • Credential theft. Uncontainerized coding agents have access to the user’s ~/.ssh directory, opening the door for secret keys being exploited and shared with unauthorized sources
  • Unintended deletion of files and directories. AI coding agents can delete files and directories that should be kept

However, as the Linux Foundation’s course states, information regarding security and AI can change. Docker’s Sandboxes addresses these concerns with these features:

  • MicroVM Technology. Each sandbox runs with its own system kernel and Docker daemon, establishing stronger isolation from the host OS than currently available with regular Docker or Podman containers
  • Networking controls. Each sandbox has its own isolated networking controls: open, balanced, and locked-down. This allows for greater control over which domains the sandbox is allowed to interact with
  • Disposability. Sandboxes can be deleted without any lingering residue on the host OS

I would also strongly recommend reading Andrew Lock’s article on Docker Sandboxes from April 7, 2026. Lock’s blog post already goes into much greater detail into how the underlying technology works and an in-depth setup on running your first project. He mainly has great documentation on his journey with Microsoft’s ASP.NET core and other developer tools, so it’s why I trust his expertise.

I would argue this MicroVM technology is incredibly important for UX designers to understand and use. Sandboxes give designers more room to experiment and fail during the discovery phase. The discovery phase of the double diamond process can be very messy with total ambiguity, but allowing that ambiguity to pour into host systems can be a liability for a business.

Also, incorporating DevOps tools like this further strengthens trust with developers and engineers. 6sense has highlighted that Docker’s market share is 86% in the containerization market, so it goes a long way to show technical fluency with the use of this technology.

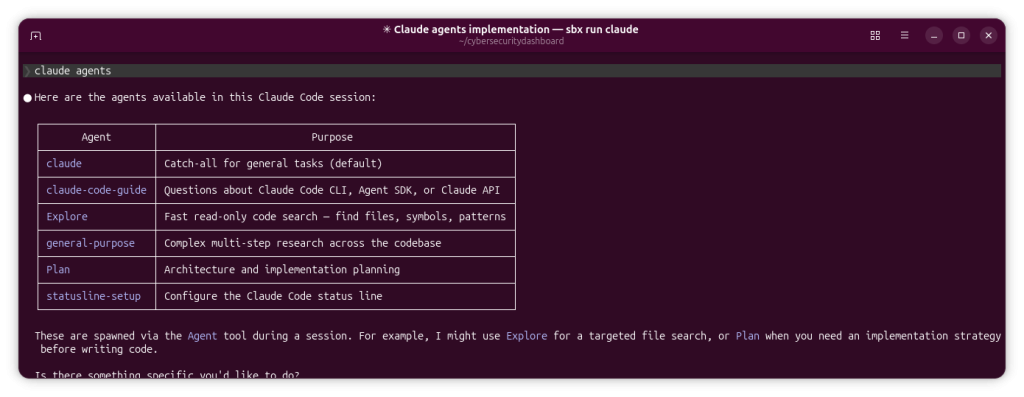
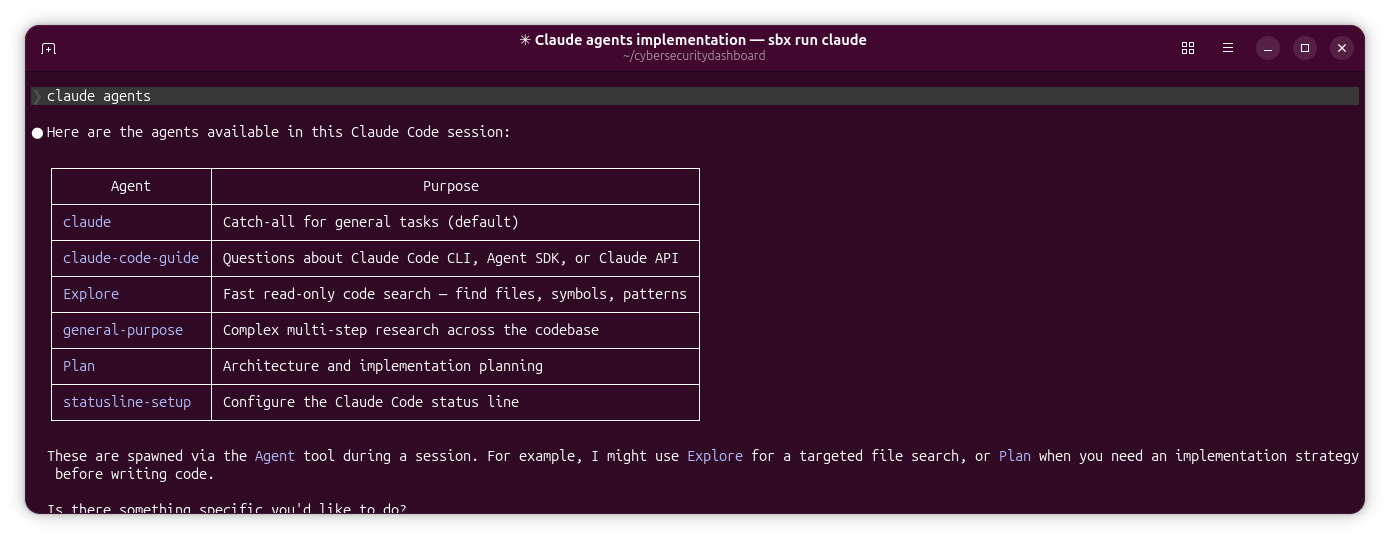
Below are a couple screenshots from my Ubuntu machine that gives some idea of how this would work for UX designers. We’re assuming we’ve already installed Docker Sandboxes on Windows, macOS, or Linux (I’m running this on Ubuntu) according to official docs. We are also assuming the Claude account is already connected to the agent within the sandbox. We’re already within the working /cybersecuritydashboard directory and we’ve launched the agent:
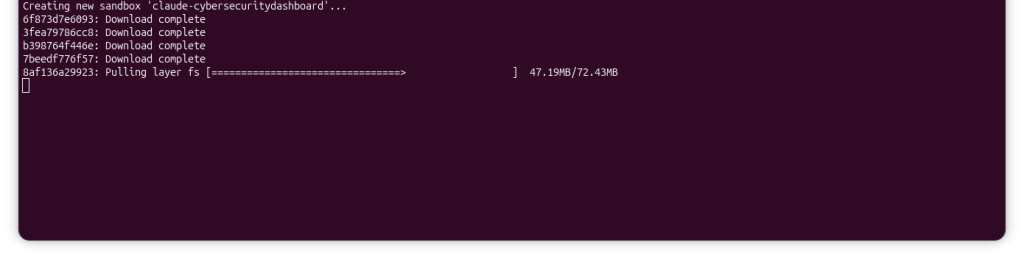
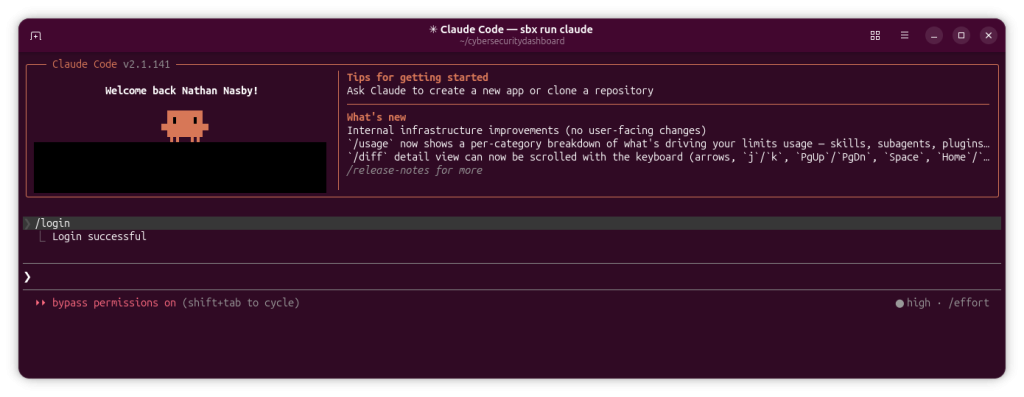
Claude Code within Docker Sandbox.
Claude Code showing agents available.

Limitations

While this is a huge step in the right direction, it needs to be said this approach has limitations for large-scale enterprise environments with established systems powered by older software platforms. MicroVM technology lacks the sophisticated hardware and peripheral emulation needed for testing designs for AI applications for these systems. This is worth noting because I’ve also been running experiments with Oracle Solaris and FreeBSD VMs powered by Vagrant + Virtualbox. That’s the biggest disadvantage right now for this technology. For large enterprises, migrating away from these established systems to newer systems in order to adopt Docker Sandboxes comes at a significant cost. Teams with this infrastructure need to further evaluate the cost + benefit of a large migration, and whether a migration will still comply with the organization’s regulations and administrative procedures.

It also needs to be emphasized that Docker Sandboxes is a commercial offering that is not under an open source license. If you are a business considering the adoption of this feature, you will need to take that into consideration. Holding a license for Docker features may lead to vendor lock-in with Docker along with feature bloat, where you can’t utilize Sandboxes without also having other features you may never use. Tracking licenses also increases administrative burden.

There is an open source project called Microsandbox on Github under the Apache 2.0 license, but lacks the commercial support and ease-of-use of Docker’s offering.

Conclusion

Limitations aside, Docker Sandboxes introduces security mechanisms that reduce several risks associated with AI-assisted coding workflows. For UX designers, this provides an easy way to vibe-code without putting data at risk.

My recommendation for UX designers working at emerging startups is to start playing with either Docker Sandboxes or Microsandbox now and see how it works within your discovery phase. Know that Docker Sandboxes is only free for personal use, so keep that in mind as you are working with this new tool.

For UX designers working with large-scale enterprise applications that rely on established systems, whether you should immediately adopt is dependent on the infrastructure and regulations of your organization. Strict administrative requirements may be a blocker to adoption.

For smoother buy-in from your UX org, it’s critical that security and isolation be emphasized over explaining the backend of the technology. The UX org may be puzzled as to why a designer is going to great lengths to adopt a DevOps technology for security when the main focus of design is process and research. The discovery phase is where this is the most necessary.

As AI tools evolve from assistants into agents capable of acting independently, designing the boundaries around those systems becomes as important as designing the systems themselves.
December 16, 2025Comments are off for this post.

Hosting ALL your AI locally…in Podman — Greater Security using Containers

Audience. This tutorial assumes you already have a basic understanding of Podman and its architecture, as well as basic networking. It also assumes Podman is already installed within Linux, on bare-metal (my setup), virtual machine, or via Windows Subsystem for Linux (W2L). It is also assumed you already acknowledge the system requirements, risks, and limitations of running AI on your local machine.

Since the release of NetworkChuck’s tutorial on May 3, 2024, Ollama for Windows is now available, but these steps are NOT compatible with Ollama for Windows.

Inspiration. In 2023, I was amazed by what could be created with ChatGPT. Being able to generate a 10-page research paper on Renaissance Art in 5 minutes was mindblowing. However, the real fun in ChatGPT came from entering prompts that generated more humorous but still company appropriate images of people who don’t exist.

Then I realized my curiosity was directing me to using AI in ways that would be incompatible with the policies of my former organization. Many organizations forbid the use of ChatGPT for personal uses, in addition to stating clearly that all data generated on company equipment automatically belongs to the company. I needed a new personal solution, completely disconnected from a professional context, that would both allow me to generate more experimental results without having any of this data be collected by either the employer or OpenAI.

So I was excited to find that NetworkChuck, a popular IT expert on YouTube, uploaded a tutorial on hosting All your AI locally. Even with making a couple tweaks to make it work on FreeBSD, it was exciting to be able to run local Large Language Models (LLMs) on my own PC under my control.

A year later, I took this basic local AI setup and built upon it, with enhanced security and minimized risk, using Podman. As someone just starting to utilize podman in my personal homelabs, I have put together this tutorial after teaching myself.

The goal. On Linux, we’re taking the Ollama + WebUI structure outlined by NetworkChuck and moving it into Podman containers hosted by a non-admin (non-root) user. Additionally, we’ll also have them run at boot as rootless Systemd services so they’re always running. This setup offers these key security advantages:

  • Daemonless. The absence of persistent background Daemons, performing tasks and services without user intervention, means no privileged process is running constantly, therefore less attack surface
  • Rootless. The Podman architecture is rootless by default, meaning impact of attack is decreased without root privileges. This means if an attacker happens to gain access to the non-admin account, it’s not as easy to take over vs a standard host Ollama + WebUI install
  • Control. The Podman setup allows for greater control over security measures with SELinux. Allowing for future hardening tweaks and techniques

With this setup, we avoid the potential security risks with a non-containerized Ollama installed with the official install.sh script from ollama.com.

Requirements. Many users have different preferences for what hardware is best for local AI. It depends on whether you want basic prompting, or advanced image generation with image diffusion. The minimum setup, based on my homelab, is at least 32GB of GDDR4 RAM, 12GB of GDDR6 VRAM, and 8-core x86 CPU. 

Podman is a widely available container platform for most Linux distributions, including ones for W2L.   

Step-By-Step Tutorial

Step 1, Ollama. Within our non-admin account, we’re going to pull the container image for Ollama and run it with this command. The structure for each command defines the name of the container, a flag that calls to replace an existing container with a new one, a flag that tells podman to restart the container if it exists, devices, tcp port to listen on, the container root, and the image:

For AMD:

podman run -d \
  --name ollama \
  --replace \
  --restart=always \
  --device /dev/kfd \
  --device /dev/dri \
  -p 11434:11434  \ 
  -v ollama:/root/.ollama \
  docker.io/ollama/ollama:rocm

For Nvidia:

podman run -d \
  --name ollama \
  --replace \
  --restart=always \
  --device nvidia.com/gpu=all \
  -p 11434:11434 \
  -v ollama:/root/.ollama \
  docker.io/ollama/ollama

For CPU-only:

podman run -d \
  --name ollama \
  --replace \
  --restart=always \
  -e OLLAMA_NO_CUDA=1 \
  -p 11434:11434 \
  -v ollama:/root/.ollama \
  docker.io/ollama/ollama

First, Now let’s verify that the Podman Ollama is working with curl localhost:11434

Should print “Ollama is running” in the console.

Or typing http://localhost:11434 in a web browser on your host machine should print the same message. If Ollama is not working, make sure the port is not being blocked by your firewall settings.

Now we can interact with our Podman Ollama with

podman exec -it ollama /bin/bash and interact as usual.

You will need to already have some LLMs downloaded for the next step to work.

Step 2, WebUI. Now for the easier part, let’s pull the container for WebUI that will automatically connect to the Ollama container. The --network=host flag tell us to run the container on localhost:


podman run -d \
  --name open-webui \
  --restart=always \
  --network=host \   
  -v open-webui:/app/backend/data \
  -e OLLAMA_BASE_URL=http://127.0.0.1:11434 \ 
  ghcr.io/open-webui/open-webui:main

Now curl localhost:8080 should print out the HTML code in the console, or typing the address in the browser should open WebUI!

Now verify that both ollama and open-webui containers are running with podman ps

We should now have the same working WebUI experience, but within pods. Follow the standard process for creating a new Admin account.

Step 3, Systemd. We now have our setup working, but let’s create Systemd services within our rootless account so both containers run at boot. Let’s make our directory:

mkdir -p ~/.config/systemd/user

Now we generate our service files:

podman generate systemd --new --name ollama --files
podman generate systemd --new --name open-webui --files

Now move systemd files to directory, still within our rootless account:

mv container-ollama.service ~/.config/systemd/user/
mv container-open-webui.service ~/.config/systemd/user/

Finally, enable the systemd services at boot so podman containers are always running:

systemctl --user enable container-ollama.service
systemctl --user enable container-open-webui.service
loginctl enable-linger [nonroot user]

Conclusion. We now have a basic setup with two containers running at boot and completely isolated from the main system. This is designed to only involve the basics of Podman, so this should be a great introductory guide to Podman + AI.

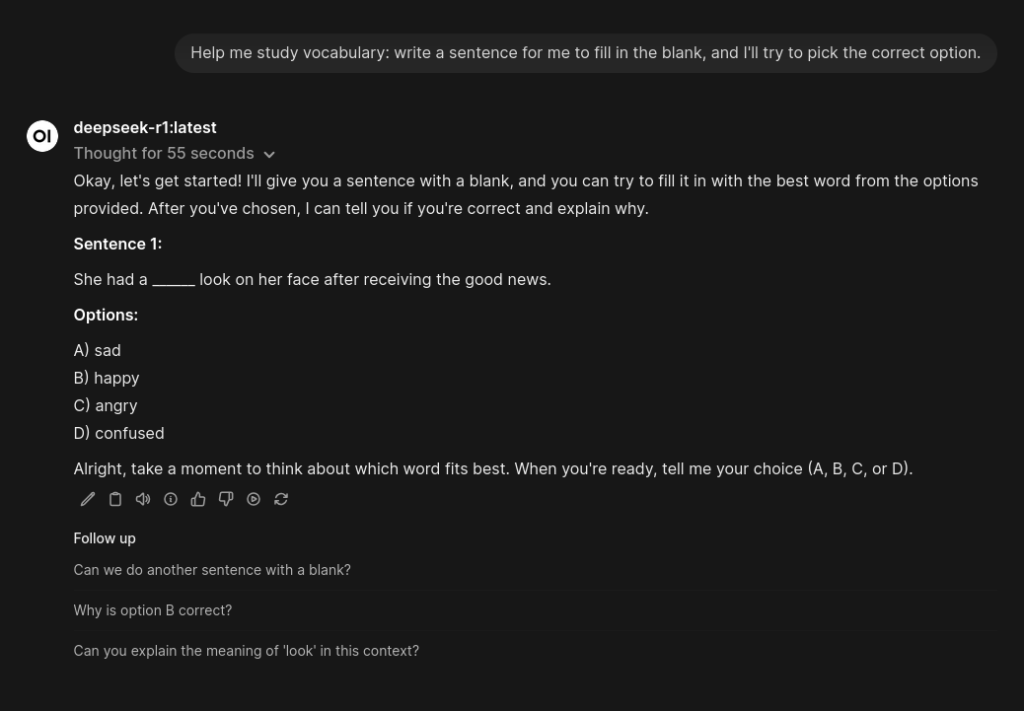
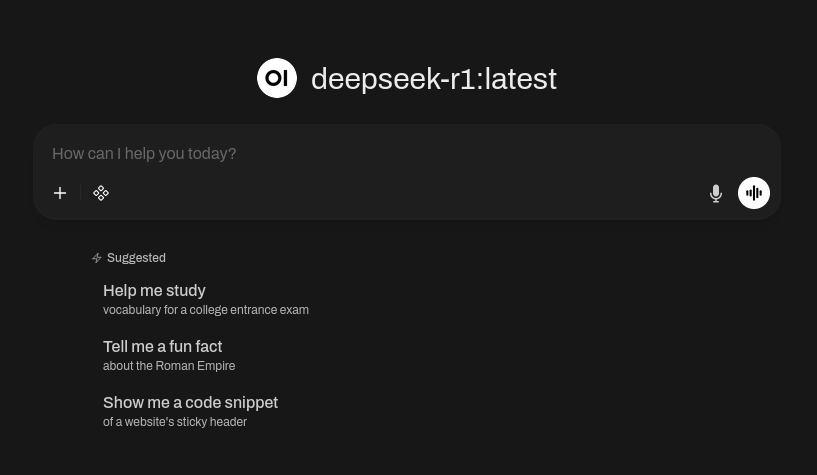
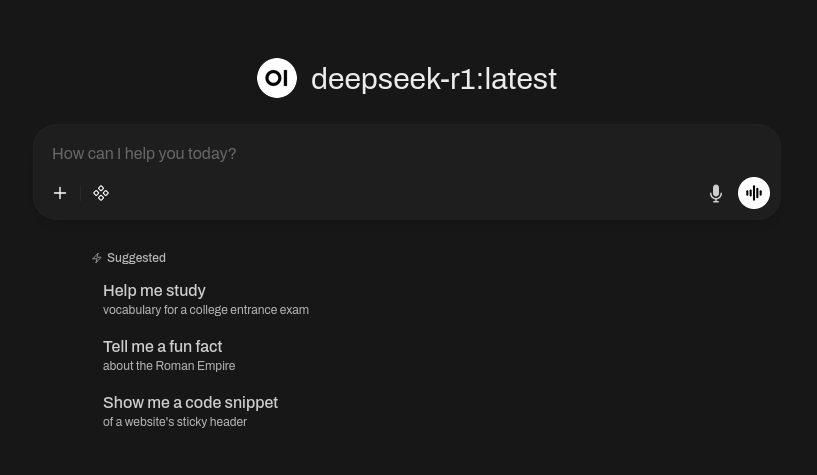
Screenshot showing WebUI homepage running on local Linux PC.
Screenshot showing WebUI homepage running on local Linux PC
Screenshot showing WebUI in action.
Screenshot showing WebUI in action

Copyright © Nathan Nasby